We had a very successful Saturday workshop the first Saturday in March! Thank you Patty for driving all the way up from Santa Monica! I taught layering using acrylics, basic abstract composition, collage, incorporating words into the painting and principles that support creativity.


After the workshop I realized that we didn’t get time to finish our transfer techniques so here it is from the top…
Transfer technique is a great way to incorporate an imperfect photographic or other image into your abstract piece to add intrigue.
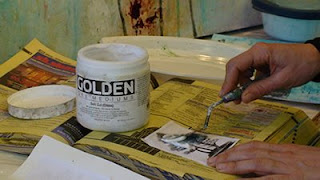
Step 1. Choose a photocopy of an image you like. Using a palette knife, apply Golden soft gel gloss to the image. Next glue this face down onto your painting substrate. (I’m using Frederix primed canvas pad in this demo) Remember to put the soft gel on the image – not the back. Using a phonebook helps with mess, just flip the page for a fresh working surface.

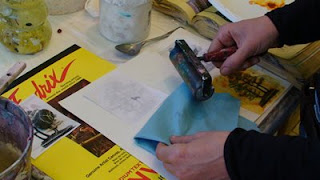
Step 2. It may enhance the image to further flatten it by placing a piece of paper towel over it and using a brayer. Let it dry overnight.

Step 3. Peel back as much as you can dry (sometimes it peels off nicely leaving the image behind)

Step 4. Using a water spritzer soak the paper image glued to your painting substrate entirely.
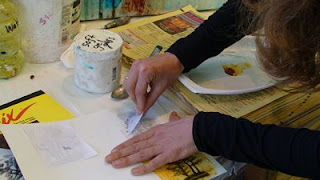
Step 5. Let the water soak in for a few minutes or so then peal away the paper pulp with a spoon. The image is revealed underneath.
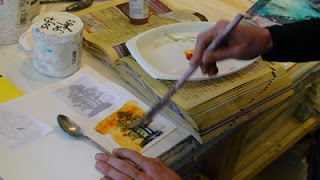
Step 6. You can paint over the transfer using liquid acrylic transparent colours. In this demo I am using Quinacradone Nicko Azo Gold. You may also want to create further transparency by adding Gloss Medium to the paint.


No comments:
Post a Comment